You Are Here: Introductory Activities
In this lesson, students pop open their notebooks and get them ready for the year. Students will take time to insert a Table of Contents, number the pages, and complete their first reflective entry.
After completing this activity, students will
A student’s science notebook is a record, both of that student’s sense-making process, and of their learning over time. Using science notebooks in the classroom allows for more integration of science with ELA, creates a place for students to construct their own meaning of science concepts, fosters student pride in their own work, and facilitates student use of authentic science tools to do real science. In addition, a science notebook can offer a tool for teachers to do formative assessment throughout a unit, semester, or school year.
In this lesson, we lay out one way for students to set up their science notebooks. In addition, we offer some steps and strategies for guiding students through this process, and continuing to use an organizational system throughout the year. This lesson and way of organizing student science notebooks will work with any style of notebook or journal you have access to. That being said, we have some recommendations for an ideal notebook ‘style’ for this purpose, which includes that each student has their own, blank notebook with unlined, plain white paper. Plain, unlined pages allow for more student ownership and varied types of entries, including sketches and diagrams. Additional scaffolds (including simple, lined pages for writing activities) can be glued or taped into the notebook, depending on the purpose of the entry. We also suggest using spiral bound notebooks so that it’s easy to flip through, and to leave open to one particular page for gallery walks and teacher review. Depending on your available resources, and your goals for and knowledge of your students, you may choose a different style of notebook.
There are three main steps in the notebook set-up process:
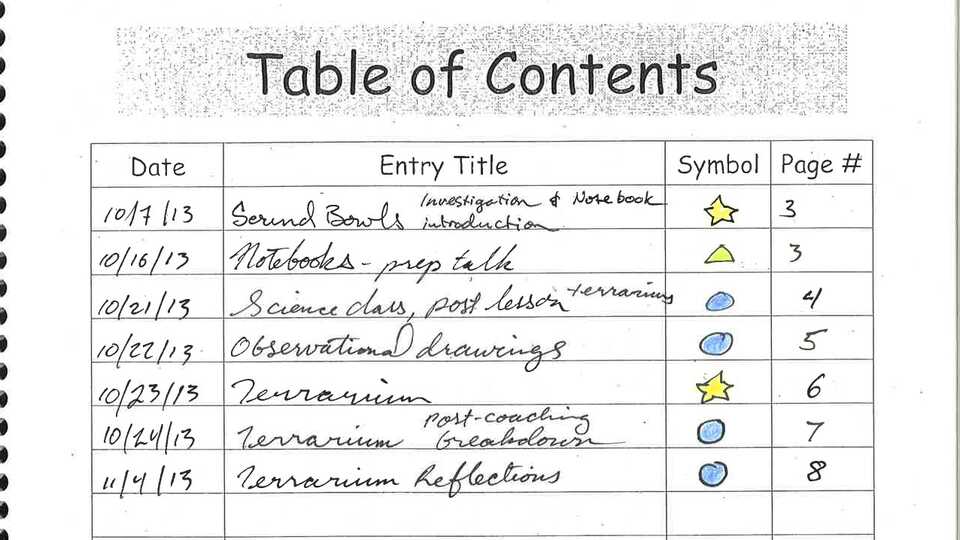
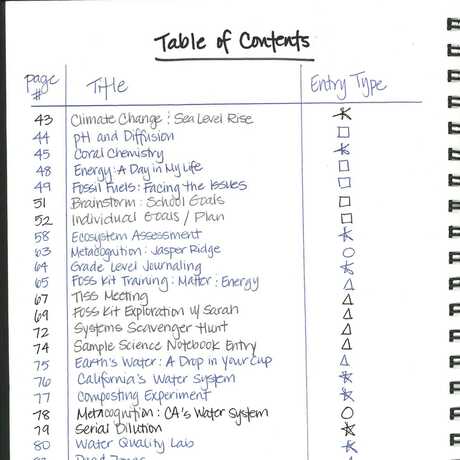
The Table of Contents can be a resource for both students and teachers to find specific entries within a student science notebook. A student might use this as a tool to continue ongoing work, or review their own progress with a particular concept, over the course of a semester or year, or even their own growth through elementary or middle school. It also models a method that many scientists use in their own science or laboratory notebooks (LASER). We provide a table of contents template to download and print for students to glue into their notebooks. You may also want to create your own. Look at examples of completed Tables of Contents here.
We also recommend that students pre-number all of the pages in their notebook. This may take a significant portion of the time you have available for notebook set-up, but it can be an important step for a number of reasons. Organizationally, pre-numbering ensures that the number is always easy to find and all blank pages are ready for a new entry at any time. This step is also another way for students to take ownership of their notebook, in addition to the arguably more creative activity, “Decorate your Science Notebook.”
We define three types of entries under which all notebook activities can be organized. The three types are associated with symbols which students will add to the heading and the table of contents. We have also included an instructor handout that details the types of entries, symbols, and example headings for your own reference. Categorizing and labeling entries helps make visible to students the types of activities we do in science. It can also help teachers keep track of whether or not all types of science activities exist in their classroom.
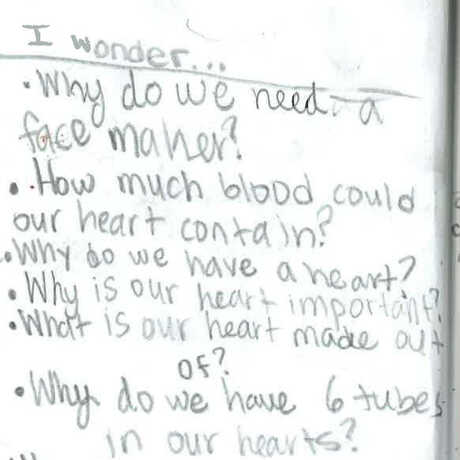
Be as flexible as you need to be so that this method of categorizing entries makes sense and is easy to use for both you and your students. For example, notice that depending on the purpose, a sketching activity may be classified as part of any of these three types of entries. You can peruse several examples of different types of entries here.
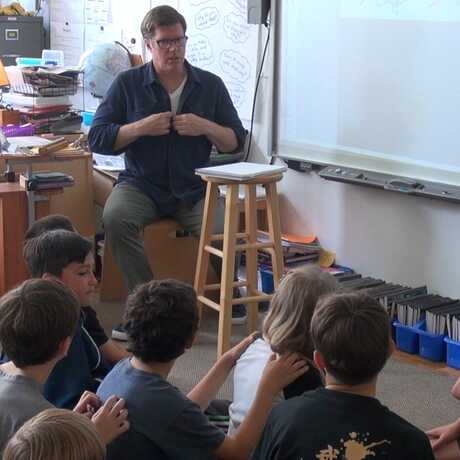
We recommend demonstrating best practices during set-up and throughout the school year by using a class notebook. During this set-up lesson, you may want to use a class notebook to model adding entries to the Table of Contents, and later add headings to blank pages by doing it right along with them and displaying the process using a document camera. Decide on what you will define as “best practice” for your classroom: Will you start a brand new page for each entry? How will you organize the space on the page? Do you want additional information in the heading, for example group members, or time of day?
Instructor Note: It may be helpful to use the accompanying presentation slides (Notebook_setup.pptx) to guide students through the following steps in setting up their notebook.
Instructor Note: The lesson “Science Notebooks Across Time” is meant to give students a sense of how notebooks are and have been used in science. Doing this lesson just before or after setting up their own science notebooks could be fun and useful for students.

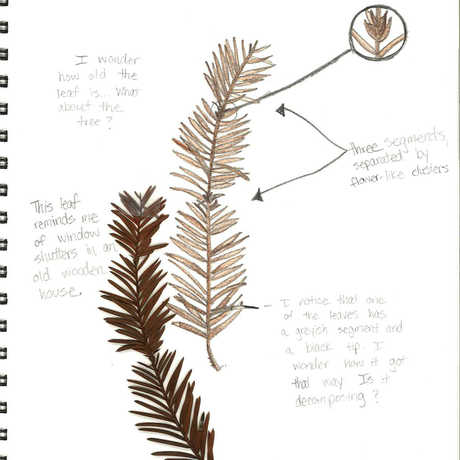
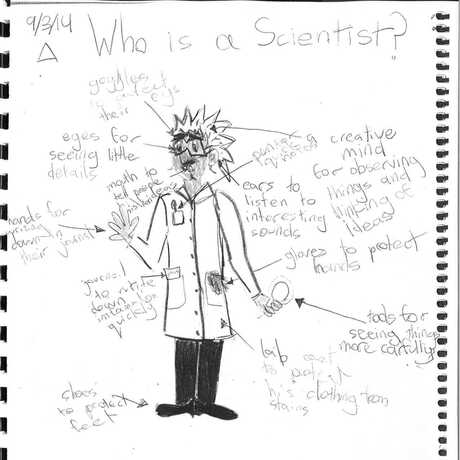
What makes a good scientific sketch? You can teach this lesson even if you think you can't draw!
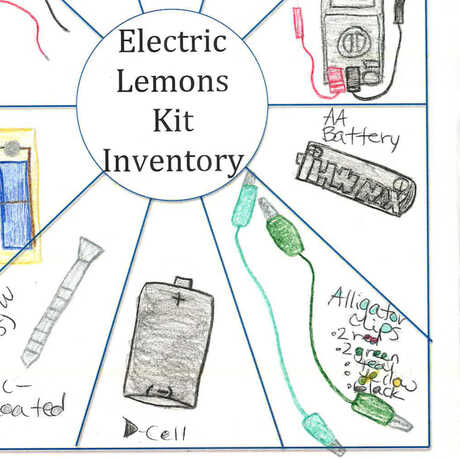
Use "windowpanes" to take stock of materials at the beginning of an investigative unit.
Learn how notebooks can help your students think and act like scientists.